Heygen AI is one of the famous AI talking avatar generator tool. You can also create YouTube videos, presentation videos, Explanation videos and many more.
Well, with the incredible advancements made by Heygen AI, that dream might just become a reality.
In this article, I’m thrilled to walk you through the process of creating an AI Avatar with Heygen that’s simply mind-blowing. They’re moving fast, so let’s dive right in and explore this fascinating technology.
How to create a Talking Avatar using HeyGen AI?
Step 1: Signing up
The first step is simple. Go to heygen.com and create a free account with Heygen.

It’s an exciting journey, and if you don’t see the ‘Instant Avatar‘ option immediately, don’t worry.
I was lucky to get Early Access, but by creating your account now, you could be among the first to try it out. Let’s move on to the next steps.
Step 2: Recording Guidelines
Now, to get the best results for your AI Avatar, there are guidelines to follow. Heygen provides clear instructions – you’ll need about two minutes of footage, looking straight into the camera. When recording, you have the option to upload existing footage or record using your webcam.

There’s even a choice between portrait or landscape modes. Select your preferred camera and microphone, pick a topic to discuss (sharing a bit about yourself is an easy option), and hit ‘start recording.’
But here’s a tip – ensure you’re directly facing the camera for accurate lip-syncing and movements. Also, consider the background and ambient sounds, as they might affect the final output.
Here’s a quick rundown:
- Aim for a minimum of two minutes of footage.
- Ensure you’re looking directly into the camera for optimal results.
When you’re set, you’ll have the choice to either upload pre-recorded footage or record with your webcam. You’ll find options for portrait or landscape mode, camera selections, and microphone preferences.
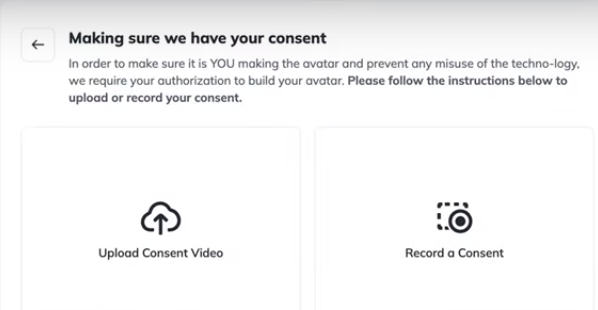
Step 3: Uploading and Consent Recording
After recording, simply drag your footage to the upload area. Remember, your video should be between two to five minutes long and less than one gigabyte in size.
If your video exceeds these limits, you can upload it to Google Drive and share the link.

Additionally, Heygen emphasizes obtaining consent before creating avatars for others. This step ensures ethical usage and prevents unauthorized avatar creation.
Step 4: Instant Avatar Creation
Once you’ve submitted your footage and obtained consent, the anticipation builds. The process usually takes a few minutes, and then – voila!

Your instant avatar is ready for action. The speed and efficiency of this system are impressive.
Step 5: Possible Uses
The possibilities with Heygen’s AI Avatar are exciting. You can utilize it for marketing content, personalized videos, learning and development purposes, fine-tuning, and even voice cloning.
Voice cloning capabilities allow your avatar to speak up to 25 different languages, enabling diverse communication avenues.
Step 6: Creating a Video with your Avatar
Now, let’s put this technology to the test! With a prepared script or content in mind, you can create a video using your AI Avatar. It’s a straightforward process – submit your content, and soon, your video is ready for review.
Example Heygen AI Avatar Video
Here’s an example of the Heygen AI Avatar in action. As showcased, the avatar seamlessly continues the conversation, providing an engaging experience.
However, some nuances might still reveal its artificial nature – limited animation, less expressive facial features, and occasional inaccuracies in mimicking accents. Yet, considering this technology is still in its early stages, the results are incredibly impressive.
Conclusion
That’s a wrap on this incredible journey into the world of Heygen’s AI Avatar 2.0. Despite a few minor giveaways, the potential here is undeniable. I can’t wait to explore the fine-tuning and voice-cloning features further to enhance the avatar’s realism.