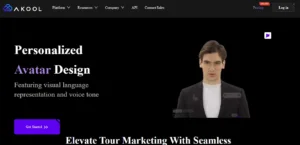
Adobe AI Character Animator is a popular and free tool for creating animated characters. Using it, you can generate your own character animations in just a few seconds.
Now is the time to rejoice because I’m introducing you to a free online animated character generator. Adobe Character Animator is your one-stop solution for creating animated characters.
What is Adobe Character Animator?
Adobe Character Animator is an editor that generates 2D animated characters easily. The user gets over 150 characters to choose from. Users are allowed to craft 2D characters with their own gestures and expressions. It also captures recording from the user for the character.

Once you are all done with basic options like character, background, and more, the character will be all set with pre-determined movements.
How to make an avatar using Adobe?
If you have had enough about listening to magic and wants to learn how to create it, you must follow this step by step guide:
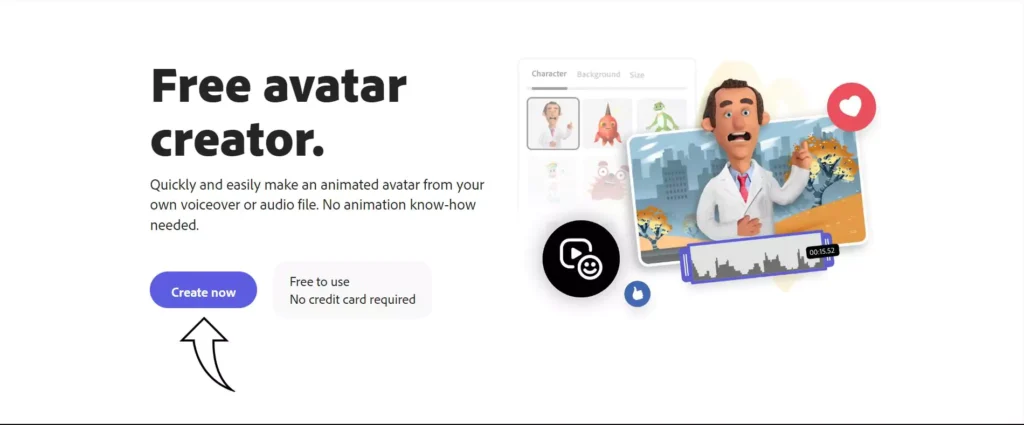
Step 1: Go to Adobe Free Avatar Creator page.
Step 2: First and foremost, you are required to click on the Create Now button. Your own virtual studio will get launched where you are allowed to get your hands dirty.
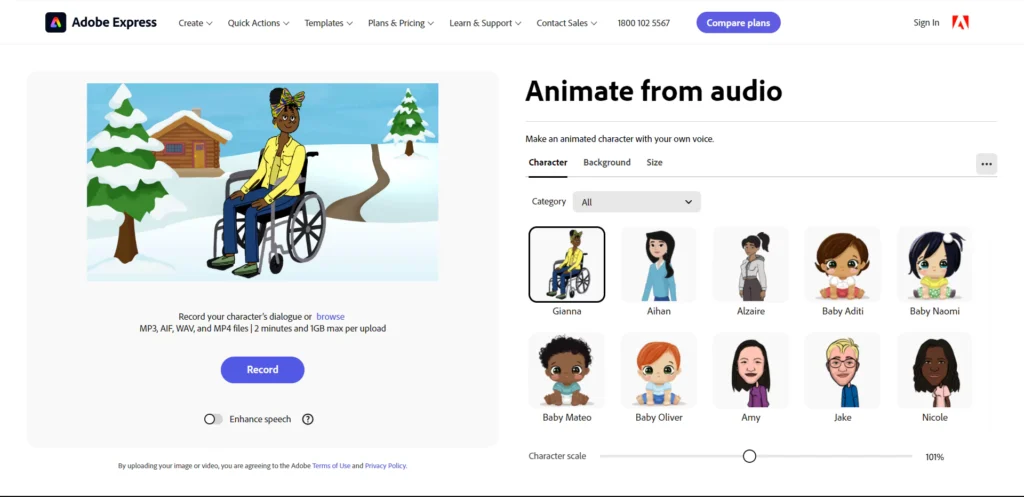
Step 3: Here, you must first select your Character from the vast number of collections. Also, set the character scale accordingly as per your convenience.
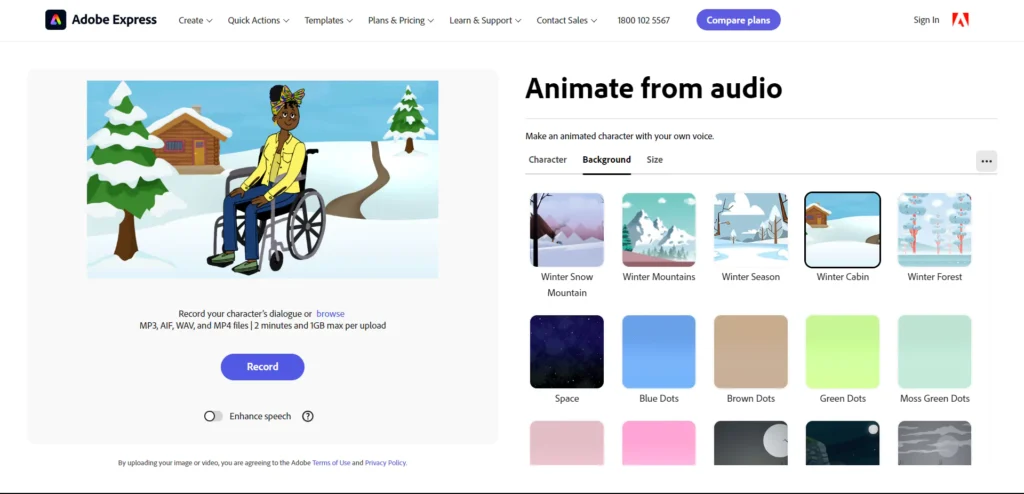
Step 4: Set the Background for your character that suits the context of your video perfectly. You can upload a specific background from your device by clicking on the Upload option.
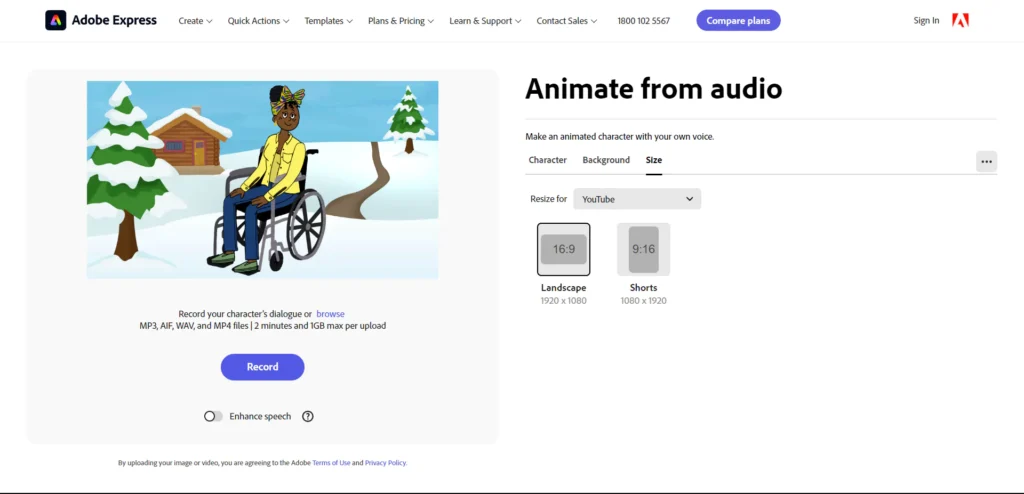
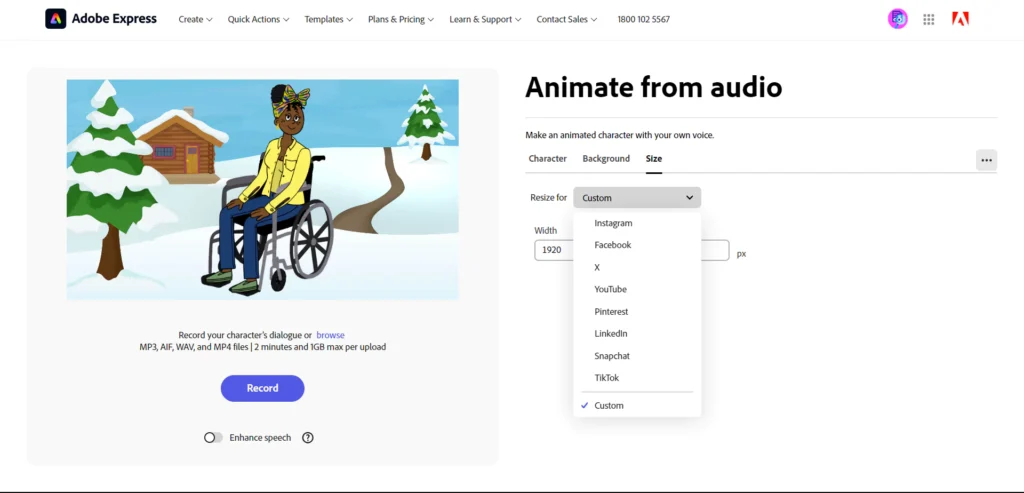
Step 5: Under the Size option, you can select the ratio of your animated video as per the social media platform you will upload it on.
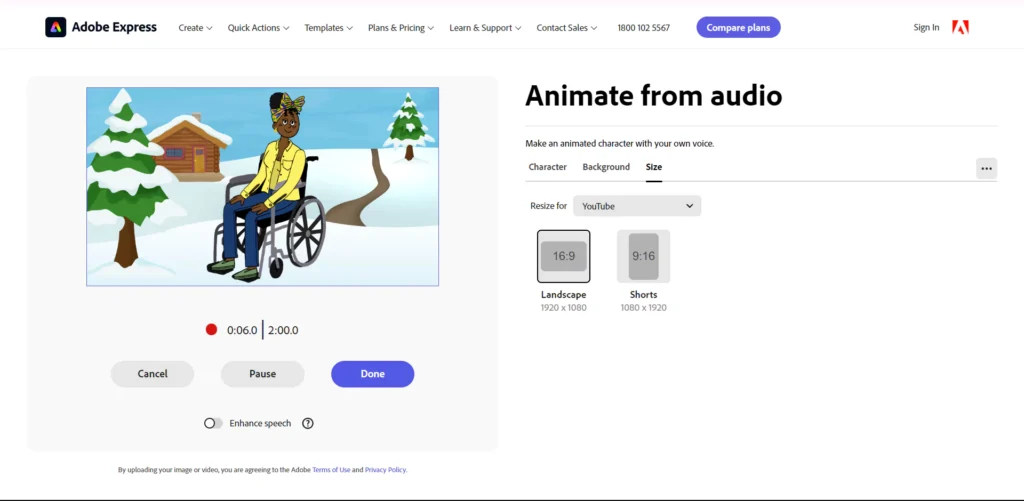
Step 6: Click on the Record button and speak up whatever you want your character to say as per the context. Make sure to click on the Enhance Speech option to get an enhanced voice.
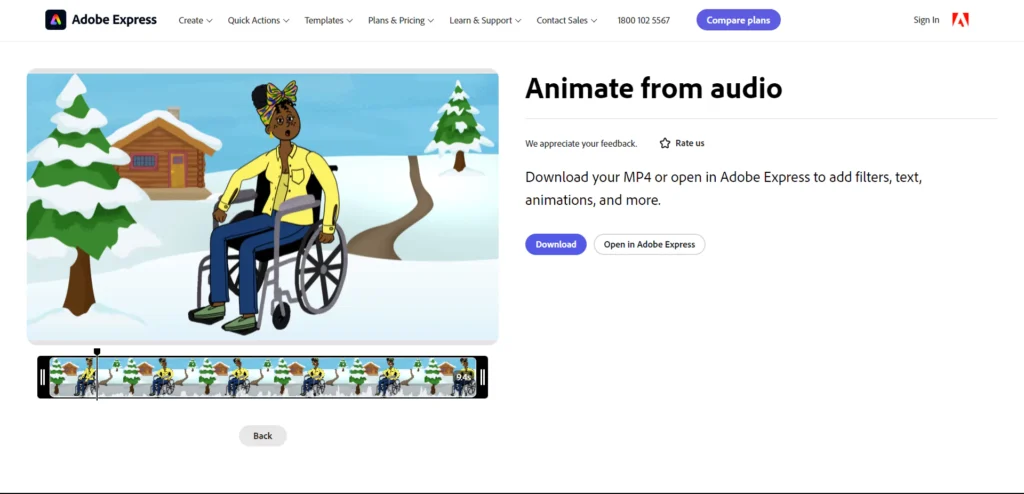
Step 7: Play the preview file and if you are satisfied with it, press on the Download button. If you believe there’s some work yet to be done, click on Open Adobe Express option.
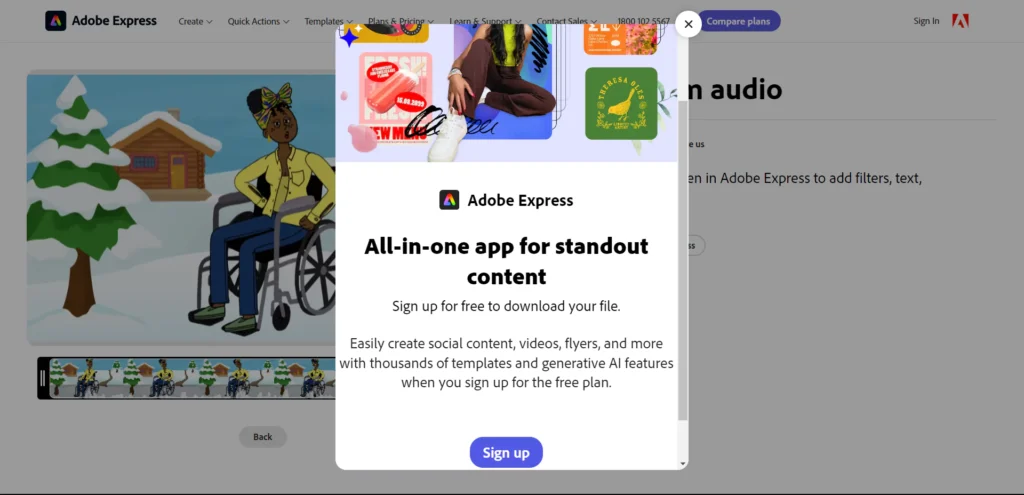
Step 8: A pop-up dialog box appears that asks you to Sign up before you proceed.
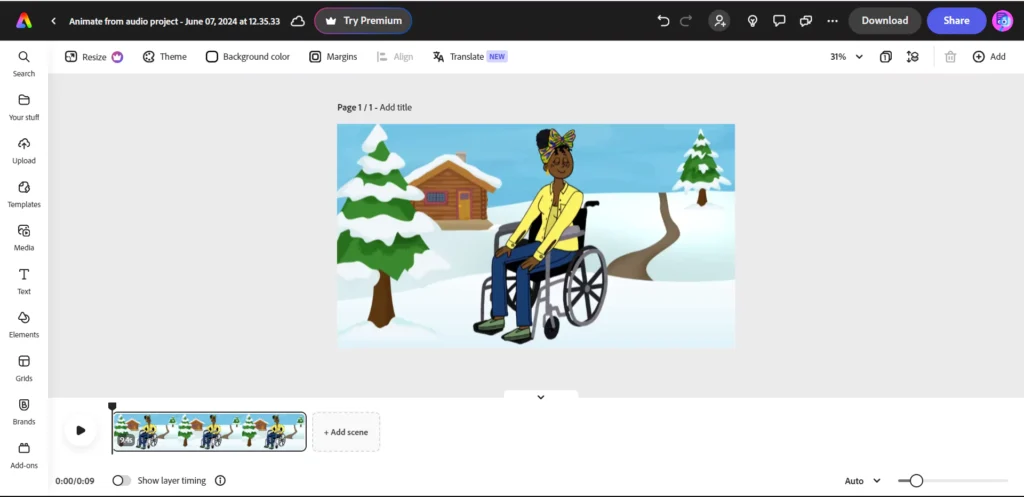
Step 9: Now, you are redirected to a more advanced studio where you get to do some detailed modifications on your animated video.
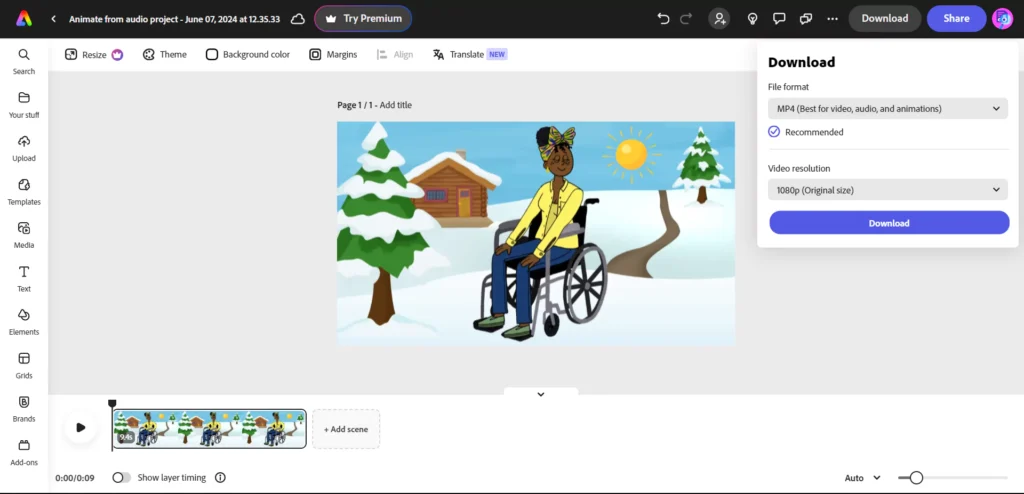
Step 10: After fully being satisfied with the editing of your image, like I added a sun on the image, you can either proceed to Download or Share the final result.
Features:
There are way too many features that are offered for the user to access. Here, I have summarized them below:
Topbar:
- Resize: This is a premium option which allows the user to set the resolution.
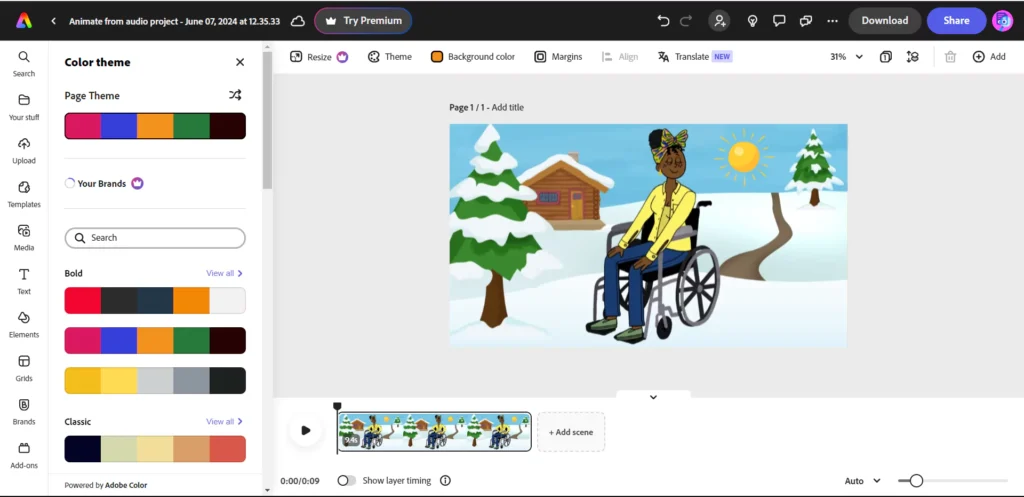
- Theme: This option set the overall Page Theme.
- Background Color: You can set the background color as per your convenience.
- Margins: You can choose the margin here, if you want to add any.
- Align: This option helps you to align any objects you have added.
- Translate: With this option, you can translate the language of the page.
Sidebar:
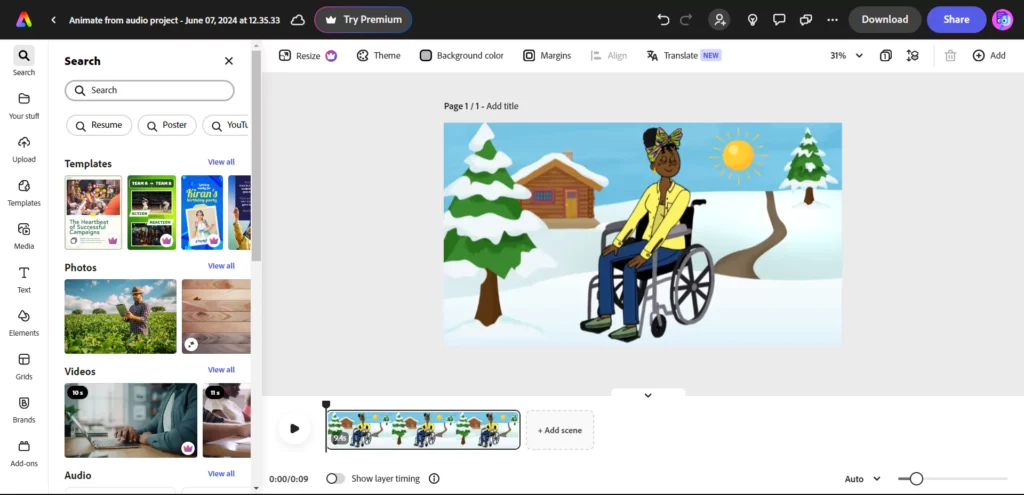
Search: Here, you can directly search as per the context of your video. You will get Templates, Videos, Photos, Audio, Backgrounds, Design Assets, Icons, and Shapes.
Your Stuff: In this option, whatever files and projects you have worked on is displayed.
Upload: Under this option, you can directly upload a file from your device which you want on the video.
Templates: This option lets you decide a set template for your video.
Media: Here, you can access from various pictures you would like to add.
Text: In this option, you can select a text you would like to have in your video.
Elements: In this option, you can select from a wide range of Brushes, Elements, Frames, Illustrations, Overlays, and Textures.
Grids: Here, you can decide a grid as per your convenience and the amount of pictures you are adding.
Brands: This is a premium option where you can create your own brand.
Add-ons: Here, you can add various extensions to help you further with your video.
On the Video:
- Remove Background: A premium option that lets you remove the background.
- Crop: Lets you crop out unwanted portion.
- Volume: Set the volume of the dialogue
- Speed: The delivery speed of the dialogue.
- Opacity: The visibility is set of the whole video.
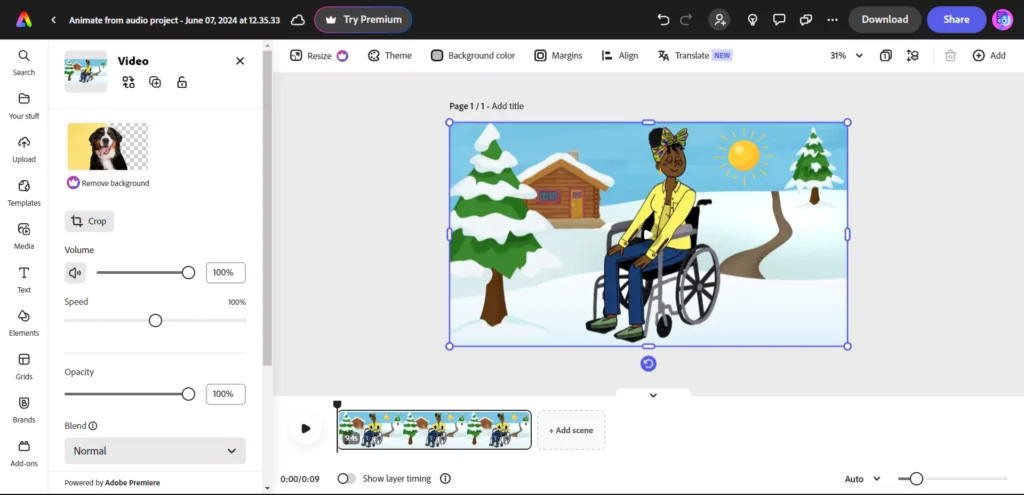
- Blend: This lets you set objects in line with the video.
- Flip Options: This is basically mirror images in all directions.
- Fit Video: Lets you fit video to the screen.
- Effects: These are set filters.
- Adjustments: You can alter various things like sharpness, brightness, and more with this option.
- Animations: You can set the proper motion for your character.
Supported Files and Formats:
To attach a dialogue to your animated character, you will have to assign a voice recording. Either you can record by clicking on the Record option or Browse from your device.
Only MP3, AIF, WAV, and MP4 files are supported. Furthermore, the time length must not exceed 2 minutes and the file size must be less than 1GB.
Use Cases:
If you are wondering where you will showcase your skillful animated character, then you can go for these social media platforms:
- Instagram: You can upload as either as a direct post, reel, story, or an IGTV post.
- Facebook: Upload as a feed or as a story.
- X (formerly Twitter): Upload in the set resolution as a post.
- YouTube: You can upload as a direct regular video or as shorts.
- Pinterest: You can pin your creation on this platform as per the set resolution.
- LinkedIn: Upload in the desired ratio as per the context or profile.
- Snapchat: Create cool animated characters and send snaps on this.
- TikTok: Use as reels in standard size to garner more views with your animated character.
- Custom: You can set custom Width and Height to use elsewhere as per your requirements.
Conclusion
AI makes the animated characters move according to the text in an outstanding way. Everything from facial expressions to body gestures looks so realistic.