
Today, I’ve got something new and exciting to share with you – SadTalker AI. This tool is my personal favorite and while D-ID produces better results, SadTalker offers fantastic results for absolutely free.
So, let’s dive into the installation process of SadTalker locally.
How to Install SadTalker AI?
Step 1: Download and Install Python 3.10.6
Download the Windows Installer (64-bit). While installing, ensure to check the option ‘Add Python to Path’.
1. Download Python Installer:
- Navigate to Python’s Official Website: Visit python.org.
- Go to Downloads: Click on the “Downloads” tab located in the top menu.
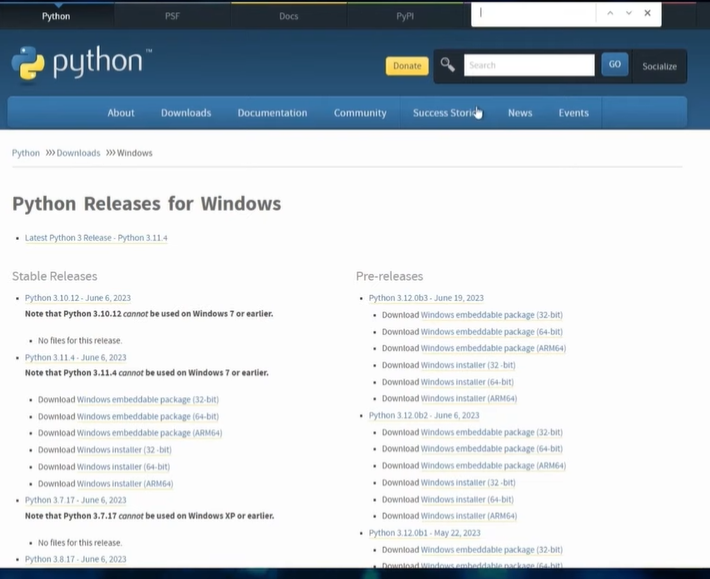
2. Choose Python Version:
Select the Latest Version: The website should automatically suggest the latest stable version. Download that version unless you have specific compatibility requirements with an older version.
3. Installation Process:
- Run the Installer: Once the installer is downloaded, open it.
- Check ‘Add Python to PATH’: During installation, ensure the option ‘Add Python to PATH’ is checked. This makes Python easily accessible from the command line.
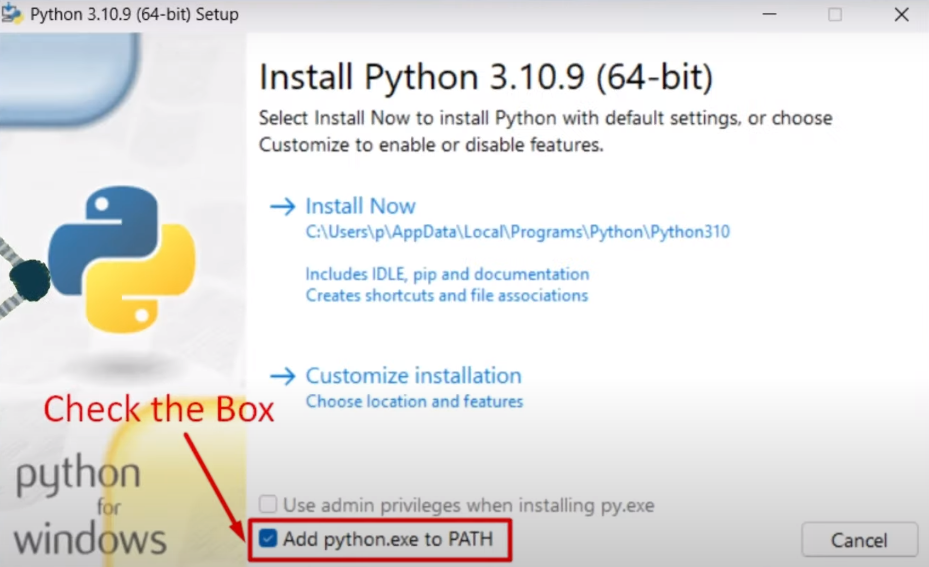
- Customize Installation (Optional): If required, customize the installation by choosing additional features. For beginners, the default settings are usually sufficient.
- Install Python: Click on the ‘Install Now’ button to start the installation process.
Step 2: Download and Install Git
Downloading and installing Git is as simple as getting the 64-bit version and installing it like any other file.

Step 3: Install FFmpeg
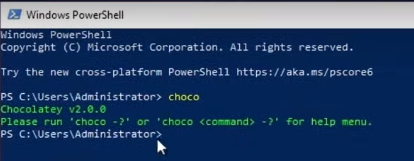
To install FFmpeg, let’s start by installing Chocolatey. Visit the Chocolatey website, copy the provided command, and open PowerShell as an administrator.

Set-ExecutionPolicy Bypass -Scope Process -Force; [System.Net.ServicePointManager]::SecurityProtocol = [System.Net.ServicePointManager]::SecurityProtocol -bor 3072; iex ((New-Object System.Net.WebClient).DownloadString('https://community.chocolatey.org/install.ps1'))Paste the command into PowerShell, hit enter, and let it install. Once installed, type ‘choco‘ to confirm.
Next, install FFmpeg by typing ‘choco install ffmpeg-full‘, accept prompts, and wait for the installation to finish.
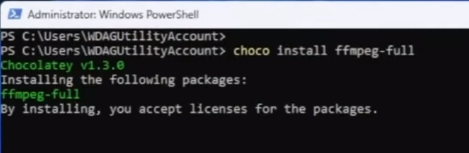
Verify the installation by typing ‘ffmpeg’.
Step 4: Clone SadTalker
Navigate to File Explorer, select the drive where you want to install SadTalker, open CMD in that directory, and type ‘git clone [URL]’. Let it install.
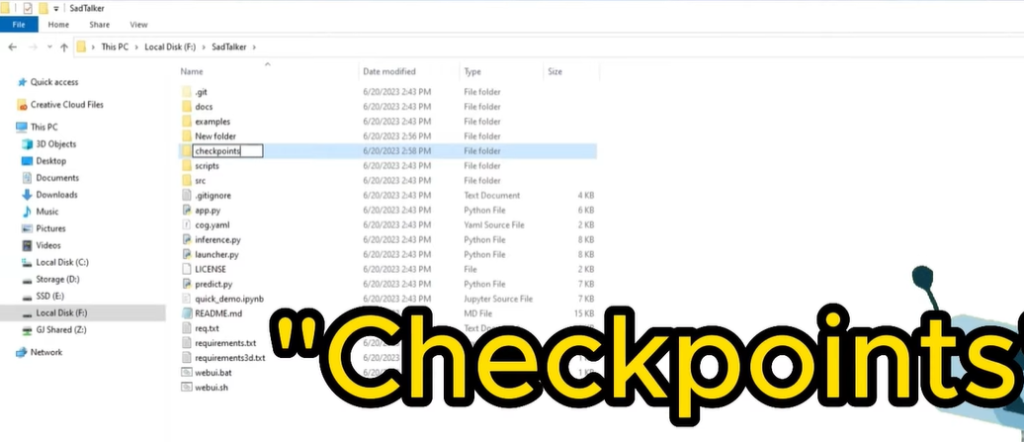
git clone https://github.com/Winfredy/SadTalker.gitStep 5: Install Checkpoints
Create a ‘checkpoints’ folder within the SadTalker directory. Download the required zip files from the SadTalker GitHub page. Extract these files into the ‘checkpoints’ folder and make necessary adjustments to the file paths.
Step 6: Launch SadTalker’s Web Interface
Double-click on ‘web_ui.bat’ within the SadTalker folder. Allow it to install. Once done, copy the provided URL (127.0.0.1:7860) from the command prompt and paste it into your web browser.
For a dark mode interface, add a specific line of code to the URL. Now, you’re all set!
Generating Your Talking Avatar
Upload your source image and audio file, then click ‘Generate’. You can experiment with different settings like size, mode, and face enhancer to achieve desired results.
Take a look at the default settings and the ones we tweaked side by side to observe the difference in output quality.
Latest Sadtalker Tutorials: